Wednesday, August 30, 2006

Blackberry Inergrating Email Account


  • Features Available*
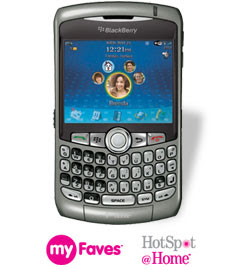
    The BlackBerry Curve 8300 smartphone has all the features you need *:
    Stay in Touch
    Wireless email: Send, receive, forward and reply to messages, and view attachments in popular file formats.
    Advanced phone features: Speakerphone and Voice Activated Dialing, user-definable convenience keys and dedicated Send, End and Mute keys
    Instant Messaging: Connect with your IM contacts using popular applications like Yahoo!® Messenger and Google Talk™
    SMS and MMS*: Send text messages and images in an instant.
    Enjoy Life
    Media player: Listen to your favorite songs and watch video clips*.
    Camera: Capture the moment in perfect clarity with 2.0MP, built-in zoom and flash.
    3.5mm stereo headset capable
    Find the Info You Need
    Browser: Navigate and browse websites with a roll and click of the trackball.
    Organizer: Synch and store your calendar data, address book and more.
    Corporate data access*: Access your vital corporate databases and applications from anywhere.
    BlackBerry® Maps: Get directions and view maps while on the road.
    Maximize Convenience
    Tethered modem capability: Use your smartphone as a wireless modem for your laptop or PC*.
    64 MB of built-in memory and an expandable microSD memory slot1.
    Bluetooth® capability for hands-free dialogue.
    Full QWERTY keyboard layout for fast text and email composition.
    High-resolution, light-sensing screen.


    Enterprise friendly
    The BlackBerry Curve 8300 smartphone works with your organization's BlackBerry® Enterprise Solution to provide corporate-strength functionality, including enhanced security features and easier access to company information.

    Unlike traditional mobile phones, the BlackBerry Curve smartphone can be centrally managed and supported by IT departments. Remote address book look-up, single mailbox integration and push delivery of data from corporate applications are just a few of the features available.
What you should to know when you signed for any Blackberry devices with any provider:


  • If your Company has Blackberry Enterprise Server(BES), make sure to ask your provider that your Blackberry is enabled for BES to add business e-mail.

Popular Supported Items

  • Add or change a signature - information obtained from Blackberry Support.


    Doc ID : KB02035
    Last Modified : 2008-02-26
    Document Type : How To


    Environment

    • BlackBerry® Internet Service
    • BlackBerry® Desktop Manager
    • BlackBerry smartphone

    Note: To determine which version of the BlackBerry Internet Service you are using, see KB04989.


    Procedure

    The signature appears at the bottom of email messages sent by the subscriber from the BlackBerry smartphone. The signature can be added or changed using BlackBerry Desktop Manager, the BlackBerry Internet Service, or the BlackBerry smartphone.

    Using BlackBerry Desktop Manager

    1. Open BlackBerry Desktop Manager.
    2. Double-click Email Settings.
    3. In the Auto signature section of the General Tab, type your signature information.
    4. Click OK.
    5. Double-click Synchronize.
    6. Click Synchronize now.

    -----------------------------------------------------------------------------

    Using BlackBerry Internet Service 2.x

    1. Log in to the BlackBerry Internet Service web site.
    2. Click the Edit beside the email account you wish to add a signature to.
    3. In the Signature section, type your signature information.
    4. Click Save.
    5. Click OK.

    -------------------------------------------------------------------------------------

    Using BlackBerry Internet Service 1.8

    1. Log in to the BlackBerry Internet Service web site.
    2. Click Options.
    3. In the Auto signature section, type in your signature information.
    4. Select Yes beside the Include auto signature in outgoing messages option.
    5. Click OK.

    -----------------------------------------------------------------------------------------

    Using the BlackBerry smartphone

    If your BlackBerry smartphone is connected to a BlackBerry® Enterprise Server, you can add or change your auto signature using the following steps:

    1. From the BlackBerry smartphone Home screen, click Messages.
    2. Display the menu and select Options.
    3. Click Email Settings.
    4. Set the Use Auto Signature field to Yes, then type your signature information in the provided field.
    5. Display the menu and select Save.

    Note: The Auto Signature field does not support image files.

    Customer Support for WorldClass International Service

    You can call Customer Care at +1-505-998-3793 from your T-Mobile handset to request WorldClass roaming while you are overseas. We cannot guarantee we will be able to add the WorldClass feature to your account while you are outside the US. It is better to add the feature before you travel. =============================================================
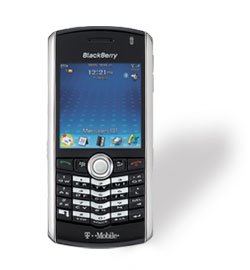


You can set up your BlackBerry Internet Service to retrieve messages from a supported existing email account and deliver them to your device. Add up to ten different existing accounts.

Verify that your device is connected to the wireless network and that you are in a wireless coverage area.
Log in to your BlackBerry Internet Service account
Click Add Account
Type the information for the account that you want to add:
Email Address: Type the full email address of the account
User Name: Type the login ID
Password: Type the password and then re-enter the password
Click Submit.
Depending on the account you add, you might be prompted to select an account type
Depending on the account type you select, you might be prompted for the following information:

.Email Server

  • Port Number


  • Outlook Web Access URL


  • Mailbox Name


  • iNotes URL


  • Leave messages on mail server


  • Utilize SSL


  • Click Submit.


  • To learn more:Blackberry Email Setting Info


    TIPS & TRICKS


    Blackberry Users Frequently asked Question.


    Using AutoText:
    All BlackBerries have AutoText. This is a feature which allows you to enter a short word - such as "mynum" (sans quotes) and when you hit [Space] after the word it is translated into something else - like your cell phone number - automatically. The list of AutoText entries is maintained under Options --> AutoText. There is a long list of entries preloaded that are handy - like you can type "cant" and when you hit [Space] after the t it will automatically be changed to "can't". There are also system variables like %p and %P that are used that translate into your phone number (%p) and your PIN number (%P). You can type these system variables, or use AutoText to translate mynum into %p. I created an AutoText entry that converts "sig" into a signature for emails that uses %O which is the Owner Information entered under Options.

    __________________________________________________________________

    How TO IMPORT Contact/Calendar from Blackberry to Outlook...

    From Blackberry Desktop Manager Choose...

    • Synchonize
    • Configuration Tab>
    • Configure Sync button>
    • Highlight Address Book>
    • click CHOOSE button>
    • Choose Microsoft Outlook>
    • click radio button SYNCHRONIZE
    • Data from both should sync to both
    • Make CERTAIN also at >
    • Highlight Address Book>
    • Configure> Advanced Settings>
    • Conflict Resolution Tab>

    That should work without having to dissect your IPD file.
    Credit TO Blackberry Forums

    Tuesday, August 29, 2006

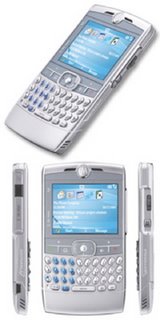
    MOTOROLA Q - Email Configuration


    Here is some info to setup your Motorola Q email account.

    Press Start (LSK)
    Select the ActiveSync Icon
    Select “set up your device to sync with it” located on the main ActiveSync screen.
    Input your mail server address in the Server Address field. https://mintzmail.mintz.com or just mintzmail.mintz.com without https.

    Press Next (RSK)

    Input your user name, password and domain in the appropriate fields. Choose whether they would like to save their password.

    Press Next (RSK)

    Choose which data you would like to sync (Contacts, Calendar, Email, and/or Tasks).

    Press Finish (LSK

    The following will also help you to setup on your desktop as well, and that is if you want to sync.

    Setting up Synchronization using ActiveSync on the Desktop

    1.In the Synchronization Setup Wizard, Press "Next".
    2.Select "Synchronize directly with a server running Microsoft Exchange Server".
    3.Press "Next". NOTE: Depending on your corporation's IT policy, the server address when configured inside the corporate firewall may be different than when configured on the device. Contact your IT administrator for the correct information.
    4.Enter the server address,
    5.your login,
    6.password, and
    7.domain. Press "Next" when complete.

    8.Choose what data you would like to sync with the server. If you choose to sync with the Exchange Server, the device will synchronize over-the-air with the email server.
    9.Press "Next" when complete. Note: Only Contact, Calendar, Email, and Tasks are synchronized with the Exchange Server.
    Press "Next".
    Press "Finish

    For More info click here: Motola Q Microsoft Exchange Server Sync Setup

    For Palm Users read HERE
    ---------------------------------------------------------------------------------------------
    SERVER TOOLS for MOBILE ACCESS

    --------------------------------------------------------------------------------

    Tuesday, August 22, 2006

    T-Mobile U.S.A. GPRS, ISDN, and WAP settings

    T-Mobile U.S.A. GPRS, ISDN, and WAP settings

    This is a simple collection of settings for use with the T-Mobile (formerly VoiceStream) U.S.A. network. I have used these settings to configure my own GSM mobile phones and other devices such as PDAs and laptops. They may or may not be accurate at a given time and are compiled here in the hope that others may find them useful.

    I have no affiliation with T-Mobile other than being a customer for several years.
    T-Mobile GPRS settings

    T-Mobile GPRS settings for terminals (e.g., phone handsets). Some items are possibly Nokia-specific. I have found the authentication type can be either Secure or Normal.

    GPRS access point: wap.voicestream.com
    IP address: 216.155.165.050
    Data bearer: GPRS
    Username: [none]
    Password: [none]
    Authentication type: Secure
    Connection security: Off

    T-Mobile GPRS modem settings

    T-Mobile GPRS network settings when using a device as a GPRS modem.

    GPRS access point: internet2.voicestream.com
    Username: voicestream
    Password: [none]
    SMTP server: myemail.t-mobile.com

    T-Mobile ISDN settings

    T-Mobile ISDN settings for terminals (e.g., phone handsets). This is an ISDN dial-up number for WAP use only. Some items are possibly Nokia-specific. I have found the authentication type can be either Secure or Normal.

    Dial-up number: +1 913 244 0821
    Data call type: ISDN
    Data call speed: 14400
    IP address: 10.168.200.50
    Data bearer: GSM data
    Username: wap
    Password: [none]
    Authentication type: Secure
    Connection security: Off

    T-Mobile WAP services settings

    T-Mobile WAP services (t-zones) settings

    Homepage: http://wap.myvoicestream.com

    Notes and Links

    T-Mobile GSM Glossary and Definitions
    Usenet newsgroup alt.cellular.gsm.carriers.voicestream at Google Groups.

    GSM network hash codes of interest:

    * #646#: show current minute usage
    * *#06#: show handset IMEI

    Apparently T-Mobile does not currently support Wireless Transport Layer Security (WTLS) for secure WAP transactions.


    More Reading and how to with other
    Carriers

    Tuesday, August 01, 2006

    GPRS Setup On Your Computer To Access Internet

    HOW TO SETUP TMobile GPRS On FLYBOOK or any other laptop with UNLOCKED GPRS
    FOR TMOBILE Blackberry 8700
    ______________________________________________________

    1. Your Wireless SolutionThe T-Mobile Wireless Data Configurator will help you build a mobile data solution around a PDA or laptop you own or are thinking of purchasing.
      Setup of BlackBerry 8700g to Laptop Windows XP using BlackBerry Universal USB Cable for GPRS
      Prerequisite
      .RIM BlackBerry 8700g handset purchased from T-Mobile
      .PC with an available USB port
      .BlackBerry Desktop Manager software installed from accompanying CD. If the CD is unavailable, visit www.t-mobile.com/bbupgrade and install the most recent version of Desktop Manager Software.
      .User should be logged in as Administrator or have administrator privileges in the profile to modify system files

      Setting up the modem
      1 On the PC, connect the USB cable from the USB port to the side of the handset. Windows will detect the handset and install the drivers.
      2 Double click the Desktop Manager icon.
      3 Click Options and then Connection Settings.
      4 Click Detect.
      5 When the Warning dialog box appears, click OK.
      6 The dialog box should display: USB handheld found, click OK.
      7 Ensure that the Connection field displays USB-PIN: and click OK.
      8 Click Start, Settings, Control Panel and double click the System icon.
      9 Click the Hardware tab and click the Device Manager button.
      10 Click the + next to Ports (COM & LPT) and make a note of which COM port is assigned to the RIM Virtual Serial Port.
      11 Return to the Control Panel and double click the Phone and Modem Options icon.
      12 Click the Modems tab and click Add....
      13 Check Don't detect my modem; and click on Next.
      14 Click to select Standard Modem Types from the Manufacturer list.
      15 Click to select Standard 19200bps Modem from the Models list.
      16 Click Next.
      17 Click to select the COM port assigned to the RIM Virtual Serial Port and click Next.
      18 Click Finish.
      19 Click once on the Standard 19200bps Modem and click oProperties.
      20 Click the Advanced tab.
      21 Type at+cgdcont=1,”IP”,”wap.voicestream.com” in the Extra initialization commands field.
      22 Click OK twice to complete the setup.

      Setting up the connection
      1 On the PC, click Start, Settings, Control Panel and then double click Network Connections.
      2 Click the link to Create a new connection.
      3 This will open a New Connection Wizard. Click Next to begin the setup.
      4 Click to select Connect to the Internet.
      5 Click Next.
      6 Click to select Set up my connection manually.
      7 Click Next.
      8 Click to select Connect using a dial-up modem.
      9 Click Next.
      10 Check the box to select the Standard 19200bps Modem.
      11 Ensure it is the only modem checked and click Next.
      12 For the ISP Name, type T-Mobile GPRS.
      13 Click Next.
      14 For the Phone number type *99#
      15 Click Next.
      16 If prompted, click to select whether you would like this connection available for Anyone’s use or My use only.
      17 Click Next.
      18 Ensure the User name, Password and Confirm password fields are blank.
      19 Check to select from the available options below and click Next.
      20 Click Finish to complete the setup.

      Making the connection
      1 On the PC, return to the Network Connections folder and double click the T-Mobile GPRS icon.
      2 Ensure that the Username and Password fields are blank.
      3 Ensure the number to Dial is *99#
      4 Click Dial .
      You will now be connected to the T-Mobile GPRS service.
    ______________________________________________________
    For all other Tmobile Device please use T-Mobile Simple Instructions